Clickable image
Aanklikbare foto
 If you click this photobucket logo in the sidebar, it brings you to the photobucket website. It's very easy to add a clickable photo to your sidebar:
 Upload the photo/image/logo you want to use, because you will need a URL. I used Photobucket's logo, it's 198 pixels wide, so it will fit perfectly in my sidebar, which is 240 pixels wide, and uploaded it to photobucket's website.
Als je op het Photobucket logo in de sidebar klikt, kom je op de website van Photobucket terecht. Zo'n aanklikbaar logo is heel makkelijk te plaatsen:
Upload de foto/tekening/logo op een foto hosting website, want je hebt een URL nodig. Ik gebruikte het logo van Photobucket.com. Het is 198 pixels breed, het past dus prima in de sidebar, die hier 240 pixels breed is.
 Copy the URL, if you use photobucket, you have to copy the upper line.
 Kopiëer de URL, als je photobucket gebruikt, neem je de bovenste lijn.
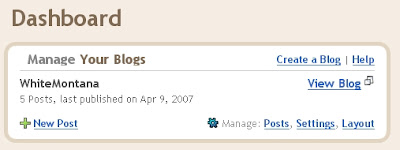 Log in to you blog. On the dashboard click "layout"
Log in op je blog. Kies "layout" op het dashboard.
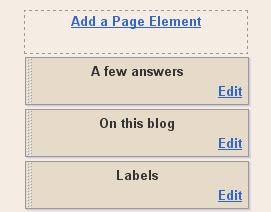 Click "Add a Page Element"
Klik "Add a Page Element"
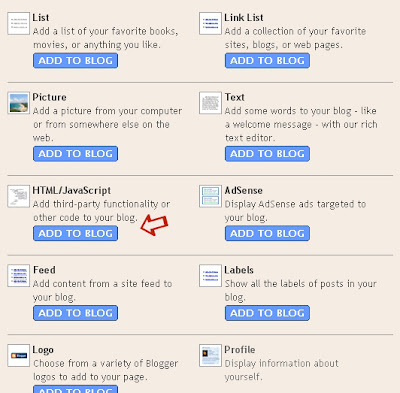 Choose HTML/Java Script from the box that pops up.
Kies in het volgende venster HTML/Java Script.
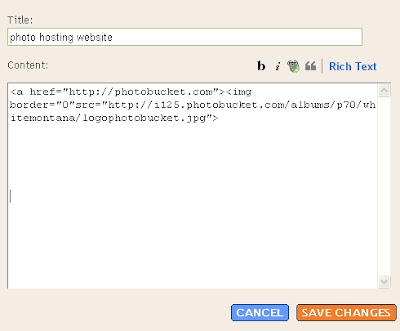 In the next box that pops up, you can add a title.
I wanted to link to photobucket's website, so that's the URL you see in the first part between the quotation marks, replace it by the URL of the website you want to link to. The second part is the code that makes the image show up on your blog, so that's where I have pasted the URL of the uploaded logo. Replace it by the URL of your uploaded image.
In het volgende venster kan je een titel invullen als je wil.
Ik wilde naar de website van Photobucket linken, dus dat is de URL die je tussen de aanhalingstekens in het eerste deel ziet. Vervang die URL door die van de website waar je naar wil linken. Het tweede gedeelte is de code die je foto op je blog zet, dus daar heb ik de URL van het logo, die ik eerder gekopiëerd heb, weer geplakt. Vervang die URL tussen de aanhalingstekens door de URL van jouw foto.

Click "preview", if it looks OK click "Save"
Klik op "Preview". Als het in orde is klik je op "Save".
![]()


5 comments:
oh, Godelieve
Thank you so much for this. This helps me, a bloger idiot :)
But I need more time to figure out the header.
Thank you, Godelieve, for this excellent blog resource, with the help of this, I have just repaired some faulty code! All my buttons work now :-)
Godelieve, thank you!! Yesterday i spent three hours trying to figure out how to do this. Now I know to check back with you first! Happy New Year to you and your family.
Godelieve, is het ook mogelijk de image in de sidebar te centreren?
dank, Martoni
ha mooi, deze zocht ik :)
Post a Comment